![Idencia-Logos-White-2023.svg]](https://knowledge.idencia.com/hubfs/Idencia-Logos-White-2023.svg)
NOTE: This lesson plan is designed for use in our Tutorial system where hands-on exercises and datasets can be created without affecting your Production Idencia system. If you viewing this lesson plan from within your production Idencia site, please contact your customer liaison for access to our Tutorial site for hands-on learning.
Login to Idencia
- Click the link below to open the Idencia Tutorial site in a new browser tab. Once a new browser tab is open and the tutorial site has been loaded, you'll need to return to this tab to finish reading your instructions.
https://tutorial.idencia.net/ - Login to the Tutorial site using the credentials below
User Name: <your email address>
Password: <supplied by your Idencia Customer Liaison> - Verify that you now have three browser tabs open for your Idencia 101 work.
- This page
- The Idencia Tutorial site
- The Idencia 101 Product Catalog
Now let's create Custom Properties for your Item Types
Create Item Type Custom Properties
- In the Idencia Tutorial Site, select Setup->Custom Properties from the left-hand navigation menu. The Custom Properties page will be displayed.
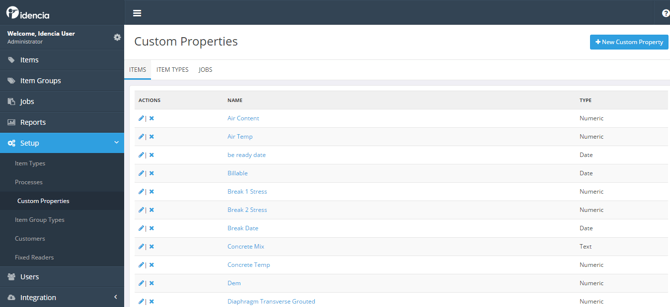
The Custom Properties page will open with the ITEMS tab in focus. Notice that the tab in focus is underlined in blue. You can now see a list of Item custom properties entered by other Idencia 101 participants. Continue the steps below to begin creating your Item Type custom properties. - Click the ITEM TYPES tab.

- Click the New Custom Property button.

The Create New Custom Property page will open. - Switch tabs to the Idencia 101: Product Catalog. Note that, besides the Product ID and Product Name, the first piece of information you'll want to capture about each Product is the Diameter. When you've finished looking over the Product Catalog, return here so that we can create a new Custom Property called Diameter.
- Because the Diameter field will be populated with numbers, the Diameter Custom Property should be numeric. Select the Numeric Custom Property radio button.

- Click Next.

Next, you'll enter a name for your custom property. Since more than one person may be using the Tutorial site, we'll need to differentiate your custom properties from theirs. To do this, prefix each of your custom property names with your first name followed by a dash. This will make all of your custom properties unique and will group them together for easy use as you progress through the Idencia 101 tutorial. - Enter <YourFirstName> - Diameter (inches) in the Name field like the example below.
Note that we've included the unit of measure (inches) in the property name. This will help Mobile Application users understand the UOM that should be used when entering data, and will help Management Portal users interpret the data after data collection is complete.
Don't worry about the other options on the screen right now. We'll circle back to those later. - Click Save.

The system will return to the Custom Properties screen with the Item Types tab in focus.
Viola! You've just created your first Item Type Custom Property. Nice job! - Using the steps you just learned, repeat this process for each of the remaining Item Type Custom Properties in the Idencia 101: Product Catalog (Wall Thickness, Gap, Length, Weight, and Concrete Class).
Use the tips below and you should have no trouble at all. When you're finished, return here and continue with the next article in the Idencia 101 Tutorial.
Remember to...
- Prefix each Custom Property name with your first name and a dash
- Be sure to select the appropriate Custom Property type (Date, Numeric, or Text) depending on the data that will be housed in that field (Hint: Concrete Class is usually a Roman Numeral or a combination of numbers and letters, not a number).
- Include the UOM in the Custom Property Name where applicable.
++ Close this window now to return to the Tutorial website and start the next task in the Task List.++
++ You may continue to the next task using the link below; however, using the link below will not ++
++ mark the tasks as complete in the Task List. ++
<< Previous: Idencia 101-5: Scenario 1-2: Get Properties from Your Product Catalog
>> Next: Idencia 101-7: Scenario 1-4: Create Stock Item Types