![Idencia-Logos-White-2023.svg]](https://knowledge.idencia.com/hubfs/Idencia-Logos-White-2023.svg)
Applicable Subscription Levels:
QC MANAGER | STARTER | PRO | PRO+ | ENTERPRISE
Overview
The Idencia mobile app comes with a set of default settings. These settings affect everything from the volume of data synced to the mobile device, how often the automated syncing process, will occur, whether or not you are shown confirmation messages, and much more.
Below are the topics that will be covered in this article:
Accessing the Settings Menu
Server
Idle Time for Synchronization
Idle Time
Sync from Selected Data Sources
Allow Scanning or Entering a Serial Number
Default scanner
Zebra Scanner Connection Help
Sync Data Time Frame
Optional Sync Data Filtering
Allow Auto Sync Images
Don't show confirmation screens
RFID Tag Translation
Backup and Restore Database Buttons
Accessing the Settings Menu
- From the mobile app Home screen, tap the Menu icon (top-right)
- Tap Settings
Server
Using this setting you can change the location of the Idencia server. This setting should only be changed if the server name was changed or was entered incorrectly.
Idle Time for Synchronization
This setting controls whether or not the syncing process should start immediately each time the user returns to the home page, or wait until the device has becomes idle before syncing.
- Disabled - The application will sync every time the user returns to the Home page.
- Enabled (default) - The application will not sync until the device has been idle for the specified amount of time. Default idle time is 3 minutes (see Idle Time for Synchronization below).
Idle Time
If the Enable Idle Time for Synchronization option above is checked (Enabled), this setting determines how long the app must be idle before syncing starts automatically. Regardless of this setting, the user will always be able to manually kick of the syncing process by navigating to the Home screen menu (three dots in top right corner) and tapping the "Sync Now" option.
- The default idle time setting is 3 minutes.
This setting is especially useful when completing multiple actions and processes that do not need to be synced to the Management Portal immediately. The application will not sync until the device is not in use, preventing the user from having to wait for syncing to finish before a subsequent action can be taken. Syncing delay also prevents potential conflicts if a new process is started before the previous process has finished syncing.
Sync from Selected Data Sources
This setting is used when accessing a database that contains data from multiple sources. Usually, this is a corporate database where data from multiple sources is aggregated. Contact Idencia Support for help using this feature.
Allow Scanning or Entering a Serial Number
Turning on this setting will allow you to scan or enter an Item's serial number. This is the most common setting and is enabled by default. If this setting is turned off, you will not be able to scan or manually enter a serial number. Instead, the application will auto-generate all serial numbers for you. The home screen will be updated to reflect this setting.
Default scanner
Click this setting to select the scanner you will be using with this mobile device.
Zebra Scanner Connection Help
Tapping this section will open a new screen where a barcode will be displayed. If you are having trouble syncing your Zebra scanner to your Idencia mobile app on an Android device, try scanning this barcode to reset your scanner for Android connectivity. Do not scan this barcode if you are using an iOS device.
Sync Data
This setting controls how much data will be synced to the mobile device.
The application will compare the last modified date of each record in the cloud database (the Management Portal) and will sync any record that has been modified within the selected Sync Data time frame.
There are several additional pieces of information that are used when determining what items will be synced, including the Sync Data time frame.
See the How does syncing work? article for additional details about the syncing process and configuration options.
Allow Auto Sync Images
This setting determines when image files (photos and signatures) will be synced to the Idencia management portal.
- Activating this setting (box checked) will automatically sync images files at the same time all other data is being synced. This setting is active by default.
- Deactivating this setting will delay the syncing of image files until the user manually kicks off the image syncing process. Separating the sync of image files from the syncing of all other data captured in the Idencia mobile app will dramatically improve the time it takes for all other data to sync to the management portal. If your image files are not needed in real time, manually kicking off the image syncing process after hours or during down time will improve the user experience.
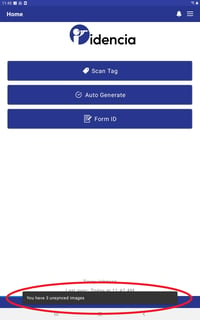
Deactivating the auto sync of image files will add a Sync Images option to the hamburger menu on your home screen. To start the image syncing process, tap this option.
Don't show confirmation screens
If this option is activated, the mobile application will not display confirmation screens like "are you sure" when you are taking an action that will delete an item or an item process. This options is primarily used during testing and is not recommended for normal use.
RFID Tag Translation
This setting controls how the mobile application translates scanned RFID information. This option should not be updated unless you are instructed to do so by your Idencia administrator.
Backup and Restore Database Buttons
These buttons provide the user with the ability to backup and restore the mobile database. These options are primarily used when troubleshooting. See your Idencia Administrator before clicking either of these options.
After you have modified the settings, select the Idencia logo at the top-left corner of the screen to go back to the Home screen.